Transplant Aerogarden Plants: A Guide to Soil Transplanting

Want to move your Aerogarden plants to soil? This concise guide offers essential tips for a seamless transition to pots or gardens.
Key Takeaways
- Aerogardens are hydroponic systems simplifying indoor plant growth.
- Transplanting is straightforward with proper guidance.
- Essential tools, pots, and soil prep are key for success.
- Gradual sunlight exposure post-transplant is crucial.
Understanding Aerogarden Plants
What is an Aerogarden?
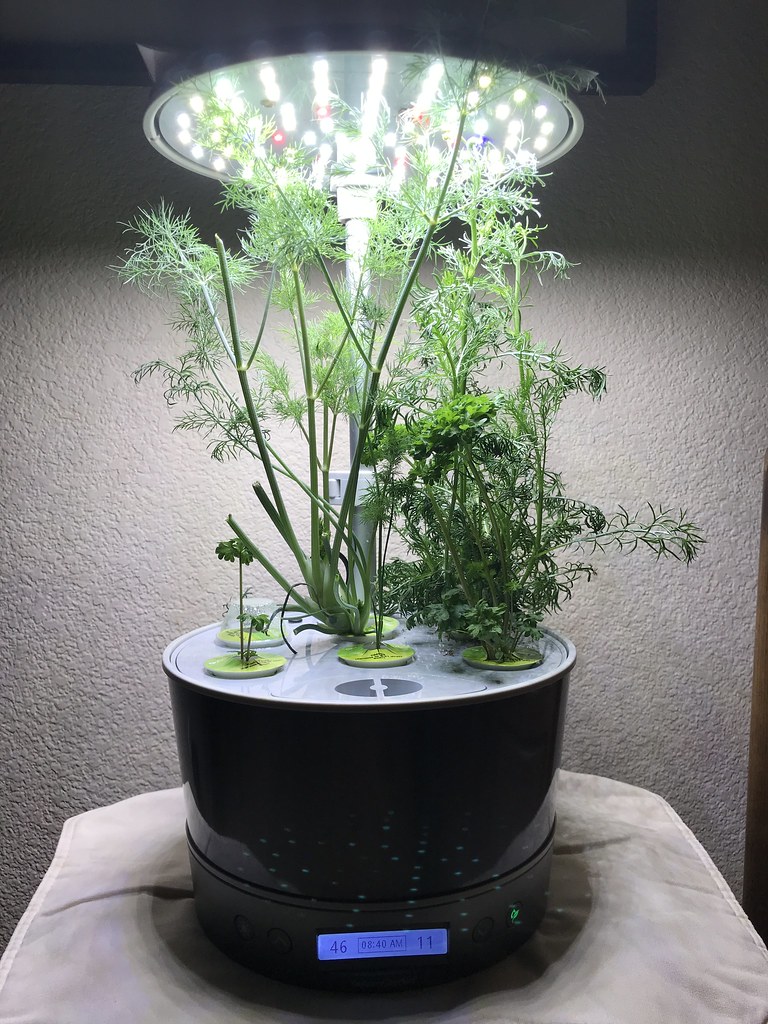
An aerogarden is essentially a hydroponic system enabling indoor soil-less plant growth. It supplies plants with nutrients and water directly to their roots. This convenient system is perfect for small spaces or those lacking a green thumb. Simply drop in seed pods, add water and nutrients, and the aerogarden does the rest. If you’re eager to grow herbs or veggies indoors, the aerogarden is an excellent start.
Types of Aerogarden Plants
The aerogarden offers a wide variety. You can experiment with greens, herbs, veggies, and even flowers. Grow fresh basil, mint, or dill in your kitchen, or salad greens like lettuce and spinach for quick meals. Feeling adventurous? Try peppers or tomato plants. Some even grow small fruits. With plants like Flowers, Greens, Herbs, Peppers, Tomatoes, Vegetables, and Fruit, the aerogarden can be a mini garden paradise.
Benefits of Growing Plants in an Aerogarden
Growing in an aerogarden offers many benefits. It’s incredibly convenient, as it handles watering schedules and soil conditions. Plus, plants typically grow faster due to constant nutrient and water access. The AeroGarden seed starting system boosts seedling growth compared to traditional methods—producing strong, ready-to-transplant seedlings in about a week. It’s like a seed starter on steroids, perfect for jumpstarting your soil planting.
Preparing for Transplanting
Choosing the Right Pot for Transplanting
When ready to transplant Aerogarden plants, start with the right pot. Use smaller, natural fiber pots if planning an eventual outdoor move, allowing plants to adjust to soil nutrients gradually and minimizing transplant shock. For permanent potted plants, larger containers with good drainage are ideal to prevent root waterlogging.
Preparing the Soil for Aerogarden Plants
Prepare your potting soil carefully. A high-quality potting mix like Miracle-Gro Performance Organics works well. Seedling starting mix can also be used for younger seedlings. Organic potting soil is preferable. Fill pots two-thirds with potting soil, moisten until damp but not wet, and make a small hole for your transplant.
Gathering Necessary Tools for Transplanting
Before transplanting, gather essential tools. A waterproof tray holds your pots to prevent mess during watering. Sharp scissors or herb pruners are crucial for carefully removing plants from Aerogarden pods and untangling roots. These tools streamline the process.
Transplanting Aerogarden Plants to Soil
Steps to Transplant Aerogarden Plants
With materials ready, begin transplanting. Fill a pot with half-inch of soil, carefully remove a seedling from its pod, and trim excess roots to fit without encircling the bottom. Position the seedling in the center with the grow sponge slightly below the rim.
Fill around the grow sponge with soil, maintaining sponge position and height. After potting, place seedling pots in the waterproof tray, soaking them thoroughly. Allow fiber pots to absorb water for a few minutes before draining excess. For a week, keep transplants in a well-lit, non-sunny spot to gradually harden, then relocate to a sunny area or under grow lights.
Techniques for Safely Removing Plants from Aerogarden Pods
Removing plants from the Aerogarden requires finesse. Carefully wiggle the grow basket out, cutting some roots if necessary. For young seedlings, removal is easy. Preserve the root system during the transplant for minimal shock, cleaning the Aerogarden post-harvest for the next planting.
For established plants, extraction takes longer, especially with entangled roots. Keep the root system as intact as possible during transplant. Be patient and gentle to minimize shock.
How to Position Seedlings in the Pot
Proper seedling positioning is crucial. Center the seedling with the grow sponge just below the pot rim. This aids in transition from hydroponic to soil, stabilizing the plant and promoting root growth. Think of it as a cozy setup for strong future growth.
Positioning is key for avoiding transplant shock, especially for tomatoes and basil. Correct placement ensures healthy plant development, making it a critical step in successful soil transition.
Post-Transplant Care
Harden Off Your Transplanted Plants
Post-transplant care involves hardening off. If transitioning outdoors, gradually introduce them to external elements. Start in a shady spot, slowly increasing sunlight exposure over a week. In unfavorable weather, keep them indoors, possibly under supplemental light.
Watering and Nurturing Your New Plants
Watering is crucial for transplanted plants. Use Miracle-Gro Quick Start solutions for initial support. Keep soil evenly moist post-transplant, transitioning to watering when the top soil layer is dry. Avoid complete drying or overwatering to prevent root rot.
Monitoring Growth After Transplanting
Monitor transplanted plants closely for signs of shock like wilting or slow growth. Ensure proper sunlight without scorching. Maintain soil moisture and overall health observation for a smooth transition from hydro to soil.
Maximizing Your Aerogarden Harvest
When to Expect Harvest from Transplanted Plants
Understanding harvest timing post-transplant is crucial. Generally, expect a delay as plants adjust to soil. Tomato plants might take additional weeks, while herbs like basil may be ready sooner. Patience pays off, leading to a rewarding soil-based harvest.
Tips for a Successful Harvest
Ensure a fruitful harvest by providing adequate light and monitoring soil moisture. Regular fertilization enhances yields. Use sharp scissors for harvesting to avoid plant damage, maximizing your aerogarden harvest.
Future Planting: What to Do After Harvesting
After harvesting, explore future planting opportunities. Replant with new seeds for annuals or transplant perennials to larger pots or outdoors. Enhance soil with fresh compost and experiment with new varieties. Starting new seedlings in the aerogarden prepares for another transplant cycle.


